
For supplies, you need a block (I use E-Z cut print blocks, they are easier than wood or linoleum.), a writing utensil, and a blade set with handle.* A piece of paper is handy to catch the mess. Ink, a brayer, paper and a tray will be used after the block is cut.
*I do not recommend the Linozip type. I find this "pull" style of cutter much harder.
*I do not recommend the Linozip type. I find this "pull" style of cutter much harder.

Draw a design on your block. Remember if you are doing text it has to be BACKWARDS. I've seen some great block ruined by not having the text backwards. I color in my design by coloring the part of the design I want to have print and leaving the parts I want to not have ink blank.

Start with your finest tipped blade.

Outline your design remembering to cut away the block that is not marked. Peel off the pieces of block by pushing the knife along the block. Make sure to cut away that detailed section with this small blade.
 I don't know how well you can see, but here is what your block will look like once everything is outlined with the small blade. Remember to cut out the the detailed places too.


 I don't know how well you can see, but here is what your block will look like once everything is outlined with the small blade. Remember to cut out the the detailed places too.
With the medium or large V-shaped blade, cut away the medium areas of the designs. In my design that is the stripe on the head, and the decorative eye.


Also, cut a lattice design in all the large areas. and re-outline the design in the larger areas. This will make it easier to peel off the larger areas because it keeps your large clumsier blade away from the details and makes it easier to take the large areas away without tearing the block material.


Now, take your large flat blade. You have 2 cutting edges with this one. One that is slightly curved and one that is rounded. Play with both edges because they are both useful in different areas.
 Peel the large areas away very similarly to how you peel a potato or apple. Your goal is to shave about a 1/6 of an inch away.
 Peel the large areas away very similarly to how you peel a potato or apple. Your goal is to shave about a 1/6 of an inch away.
It will look choppy and horrible when you are done, but as long as there are no pieces as high as the design, it's all good.

This is why the paper is a good idea. It makes a mess to carve this stuff.

I like to quickly check my design by running a marker along it to make sure there isn't any stray block sticking up.

Squirt a little block printing ink onto a pan. (A washed meat tray from the butcher works well.) If you want to print onto fabric, now is the time to add a little fabric medium to your ink. Spread the ink with your brayer (the back of a plastic spoon also works).
 Apply your ink to your block. You can either use the brayer, or use the ink you spread out as a "stamp pad."
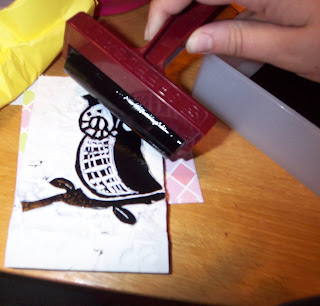
 Press the cut pad onto the item you are printing. Apply firm pressure and press all sections.

Lift to reveal your design.


Lift to reveal your design.
Block printing can be used on shirts, cards, posters, bags, anything. It adds a nice rustic design. It's great to create a set of stationary for a friend, or for you to send one of a kind cards. The best part is, once your block is done it literally takes seconds to make a print. (Not including clean up.)
 Try playing with mixing ink colors (make two or three dots of ink an inch apart) for a rainbow effect like the flying heart card which was done with a dot of pink and a dot of silver.
 Try playing with mixing ink colors (make two or three dots of ink an inch apart) for a rainbow effect like the flying heart card which was done with a dot of pink and a dot of silver.
No comments:
Post a Comment