Tuesday, January 20, 2009

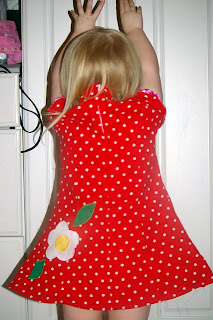
A few months ago the toddler and my mom picked out some ribbon at that W store. I was told I needed to make a hairbow from it. That hasn't happened yet, but it did inspire this tunic.
I used the ribbon on the sleeve.
Appliqued a flower that looks like the one on the ribbon.

And a Hello Kitty on the front. The toddler loves it. The pattern is Roxy by Farbenmix. The fabric is something I bought at Hobby Lobby.

Wednesday, January 14, 2009

Gymbo blankets

Gymbo blankets make GREAT fabric. You get a print, a solid that matches, an embroidery that matches and binding and if you're lucky you get them on sale for $10! Good deal.
Sometimes, I will get them for more if it's a print that I *love* but only came in the baby sizes. Anyways, on my online sewing group it was asked how to take them apart and save the binding. So, Here is the best way to take apart a gymbo blanket.
First, you need to unpick the stitches holding the tag on.

Find the place where the binding starts and stops. It's about 2 inches from where the tag was.

Next on the "Right" side (The right side is the solid color with the embroidery) about 1 inch to the right of where the seam of the binding is you need to unpick 2 or three stitches using either a seam ripper or small scissors. Do not start on the binding seam because this is is top stitched down, not chain stitched! (The seam of the binding is being held in my left hand in their picture if it helps you visualize)

Next pull the binding a little bit from the blanket and snip one stitch on the side of the "hole" in stitches away from the binding seam. (to the right in this picture)

When you flip over the blanket and gently tug on the chain stitching, the thread should pull out easily. If not clip one or 2 more stitches on the other side.
Once you get it to pull easy, just keep pulling and pulling.
Until you get to the seam.
Now, you will need to pick stitches again. There are 2 layers of stitches to pick here.
Wallah! The binding is off.
Next go around the blanket cutting the looper stitches.
And pull the two layers apart. it comes apart REALLY easily this way.

Troubleshooting:


If you get a snag on the chain side's tread, do NOT yank. This will make a horrible knot and you'll have to start over on getting it undone by picking threads.
Simply, flip your blanket over and pull on the single thread. Give this a nice firm tug.
Flip over again and gently pull to see if the snag came undone. Try again. If it doesn't work after 2 tries, go ahead an unpick a few stitches on the right side and try again.

Wonder what to do with gymbo blankets?
BubbaChic made an adorable dress from one.
Material Mama made a romper for a baby.
Lots of people make diapers to match their gymboree clothing.

Tuesday, January 13, 2009

Happy Birthday Fabric Hound

Free  Stoffe-Fabrichound.com Giveaway
Fabric Hound is having a contest for their BIRTHDAY! Go enter for some GREAT prizes. There are some beautiful fabric at Fabric Hound. This is my favorite! (It was hard to choose one. The colors are so bright and it's SOFT.)
Tons of patterns can be found there too. This Antonia Pattern from Farbenmix is uber cool!
Good Luck!

Sunday, January 11, 2009

Painting

The toddler had some friends over, and my floors were already messy and needing to be mopped, so we swept the toys out of the way and unrolled sheets of paper on the floor. A good time was had by all!
They made some great finished products.
And I had a wonderful mess to mop up! Much more artful then the food spills that I normally have to clean up!
The toddler even had fun helping me clean up. Ah, to be 2.5 and think mopping it fun again.

Thursday, January 8, 2009

I need a Dwess, Go Sew!

We needed to run to the store today for some necessities like crescent rolls for my other blog. But my little diva told me she wanted to wear a dress. A new dress. And that I had to go sew it now. She originally said it should have flowers, but changed her mind to hearts when she saw this "favgic."
A twirl test.

Standing still with the hood up.

Who could turn down this face? Of course the fact that her demand was sewing didn't hurt her chances of getting this new dress.

Sunday, January 4, 2009

Fun time with Mini Me

After digging through the dollar bins at Target, we came home with 3 packs of window clings. My daughter LOVES window clings. In my opinion it's well worth the $3 to have the 30 minutes of putting up the window clings, the days of her readjusting where the hearts go, and her telling me the colors of the hearts. Plus it brightens up the kitchen window.

Saturday, January 3, 2009

My kind of laundry...


A few yards of fabric snuck home with me when I was out getting "only" a new bottle of photo emulsion for screen printing, super glue, eggs and milk. I'll blame it on my daughter. Who can say no to a 2.5 year old that LOVES fabric?
As soon as we got in the door, she snuck a piece out of the bags to "sew" it on her sewing machine that lives in the living room.
(This is her machine that my dad made for her for Christmas. Isn't it purty? This picture was taken Christmas day, so ignore the stack of toys behind it. Also imagine it on a wooden cabinet instead of on the couch!)

Block Printing

One of my million craft/hobbies is block printing. I realize many people do not know how to block print and the tools can be intimidating. The only places I know where to find the supplies are Dick Blick and Hobby Lobby. (Make sure to check for/print a coupon before going to the store!) Block printing is a fun, messy, and versatile hobby. I highly recommend it.

For supplies, you need a block (I use E-Z cut print blocks, they are easier than wood or linoleum.), a writing utensil, and a blade set with handle.* A piece of paper is handy to catch the mess. Ink, a brayer, paper and a tray will be used after the block is cut.
*I do not recommend the Linozip type. I find this "pull" style of cutter much harder.
Draw a design on your block. Remember if you are doing text it has to be BACKWARDS. I've seen some great block ruined by not having the text backwards. I color in my design by coloring the part of the design I want to have print and leaving the parts I want to not have ink blank.
Start with your finest tipped blade.
Outline your design remembering to cut away the block that is not marked. Peel off the pieces of block by pushing the knife along the block. Make sure to cut away that detailed section with this small blade.
I don't know how well you can see, but here is what your block will look like once everything is outlined with the small blade. Remember to cut out the the detailed places too.
With the medium or large V-shaped blade, cut away the medium areas of the designs. In my design that is the stripe on the head, and the decorative eye.
Also, cut a lattice design in all the large areas. and re-outline the design in the larger areas. This will make it easier to peel off the larger areas because it keeps your large clumsier blade away from the details and makes it easier to take the large areas away without tearing the block material.
Now, take your large flat blade. You have 2 cutting edges with this one. One that is slightly curved and one that is rounded. Play with both edges because they are both useful in different areas.
Peel the large areas away very similarly to how you peel a potato or apple. Your goal is to shave about a 1/6 of an inch away.
It will look choppy and horrible when you are done, but as long as there are no pieces as high as the design, it's all good.
This is why the paper is a good idea. It makes a mess to carve this stuff.
I like to quickly check my design by running a marker along it to make sure there isn't any stray block sticking up.
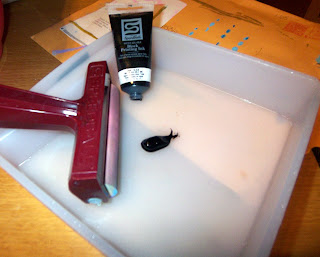
Squirt a little block printing ink onto a pan. (A washed meat tray from the butcher works well.) If you want to print onto fabric, now is the time to add a little fabric medium to your ink. Spread the ink with your brayer (the back of a plastic spoon also works).
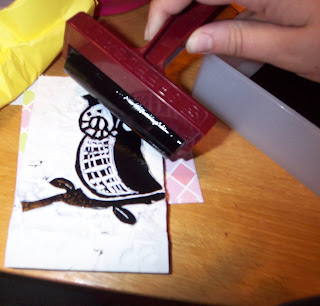
Apply your ink to your block. You can either use the brayer, or use the ink you spread out as a "stamp pad."
Press the cut pad onto the item you are printing. Apply firm pressure and press all sections.

Lift to reveal your design.

Block printing can be used on shirts, cards, posters, bags, anything. It adds a nice rustic design. It's great to create a set of stationary for a friend, or for you to send one of a kind cards. The best part is, once your block is done it literally takes seconds to make a print. (Not including clean up.)
Try playing with mixing ink colors (make two or three dots of ink an inch apart) for a rainbow effect like the flying heart card which was done with a dot of pink and a dot of silver.

Friday, January 2, 2009

Twinkletoes

So, on November 21, 2008 my buddy Jill and I met up and she (re)taught me to knit. She claims she did nothing, but she did. See, the last 2 times I tried to teach myself to knit don't count. My stitches were uneven, I could only knit and not purl. I just didn't *get* it. I had decided that I wasn't a knitter. Until I saw her knitting a Pilot Cap for her niece and I was so green with jealousy. She agreed to take me on as a student. After one session of her walking me through the difference between a knit and a purl and helping me remember how to cast on, I did it! I did it on the wrong size needles of course (oops. It was supposed to be US size 6 and I somehow got 6 mm which means US size 10) and the hat fit me, not my daughter. And it didn't shrink/felt when I washed it. So... I got a hat. I re-did it on the right size. Then I did a hat for my dad and father in-law. I now declare myself a knitter. An addicted knitter.
Today my husband took the kiddo out to help fix "MorMor"s computer. So, I finished a pair of slippers slipper for ME! Comfy Yarn in blackberry and the Twinkle Toes pattern. I even have the suede slipper bottoms for them. Do you know how hard it is to get a picture of your own foot? This is the best I could do.

The pattern wasn't tough, but I used 3/4 of a skein of yarn when the pattern said one skein should cover the pair. I think I was just a little loose in my knitting out of fear of the finished product not fitting! I need to order another skein to do the second slipper.
My daughter saw it as I finished and said she needs "reena slipperd" (ballerina slippers) too. Good thing I bought the yarn to make her a pair too.
For those that may want to take on this pattern and a new-ish knitter like me, here are videos I used to learn new (to me) knitting maneuvers used in this pattern-- Provisional cast-on, Lifted Increase, Wrap and Turn (she's a little goofy, but she made it click what was happening on this step), Cable cast-on

Thursday, January 1, 2009

Yum cookies


Today, I wanted to use the block of cream cheese I had left from Christmas. So, I made cookies. Gooey Butter Cookies. I added extra powdered sugar after they baked and they were great! As you can tell my daughter wanted another one after she had one. (They were already cooled completely when I was taking the picture.) They are all hidden out of site now so both my husband and the kiddo could resist keeping their grubby hands off of them.
It didn't work though. Every time she went potty she informed us she deserved a cookie.

Projects in the works: Twinkle Toes slippers, Daisy Cardigan, and deciding on and outfit for a little buddy.
Free  Stoffe-Fabrichound.com Giveaway